Internal storage in desktops and laptops or external hard drives sometimes displays 0 bytes free. The error confuses many people. Especially if they know the hard disk drive (HDD) or solid-state drive (SSD) has not reached its storage capacity. However, it can still prevent you from accessing important data when needed.
These disk space errors often occur due to file system corruption, bad sectors, malware, or improper formatting. Thankfully, there are several ways to fix a hard drive that shows 0 bytes free.
We explain common causes of the error and provide simple solutions, including a step-by-step guide for using SecureRecovery® to restore lost files.
Common Causes for Hard Drive Showing 0 Bytes
A hard drive showing 0 bytes free does not always mean that the drive is full of data. It usually suggests the system cannot recognize the actual storage space on the disk.
Any of the following failures could cause this error:
- File system corruption impedes the operating system (OS) from locating data.
- Bad sectors and other physical damage make large portions of the drive unreadable.
- Malware or viruses conceal or corrupt data.
- Formatting mistakes or improper ejection leads to a RAW file system.
Diagnosing the root cause of the error is the first step in resolving the problem.
How To Check if Your Hard Drive Is 0 Bytes
There are a few symptoms that signal deeper issues with the device. The drive might appear full in File Explorer (Windows) or Finder (macOS). The OS may label the file system as RAW in Disk Management on PCs or Unknown in Disk Utility on Macs. Poor performance and frozen file transfers could also indicate a storage problem.
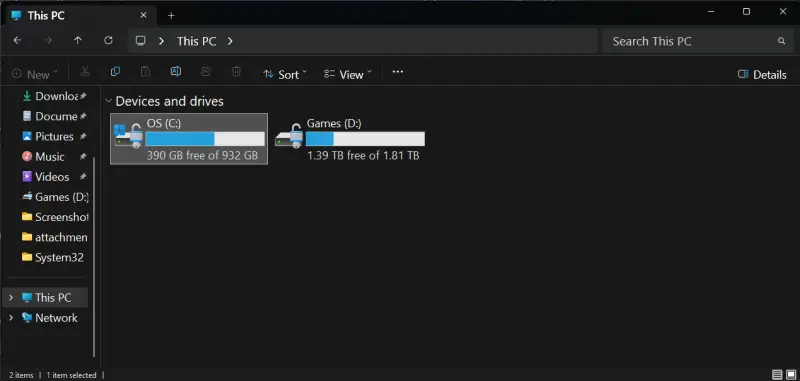
To check File Explorer on a Windows computer:
- Press the Windows key + E at the same time.
- Click This PC.
- Right-click the affected drive and select Properties from the menu.
If Windows shows the used space and free space as 0 bytes, then proceed with troubleshooting.
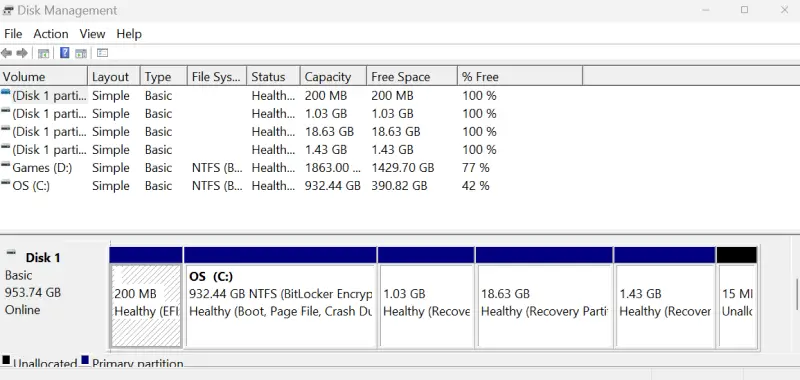
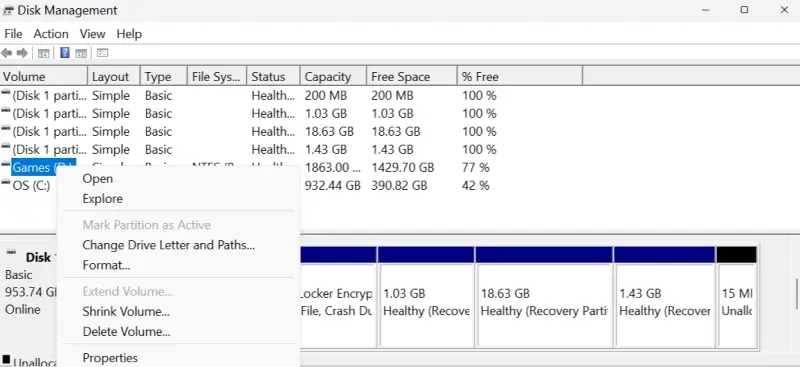
To check the drive’s file system:
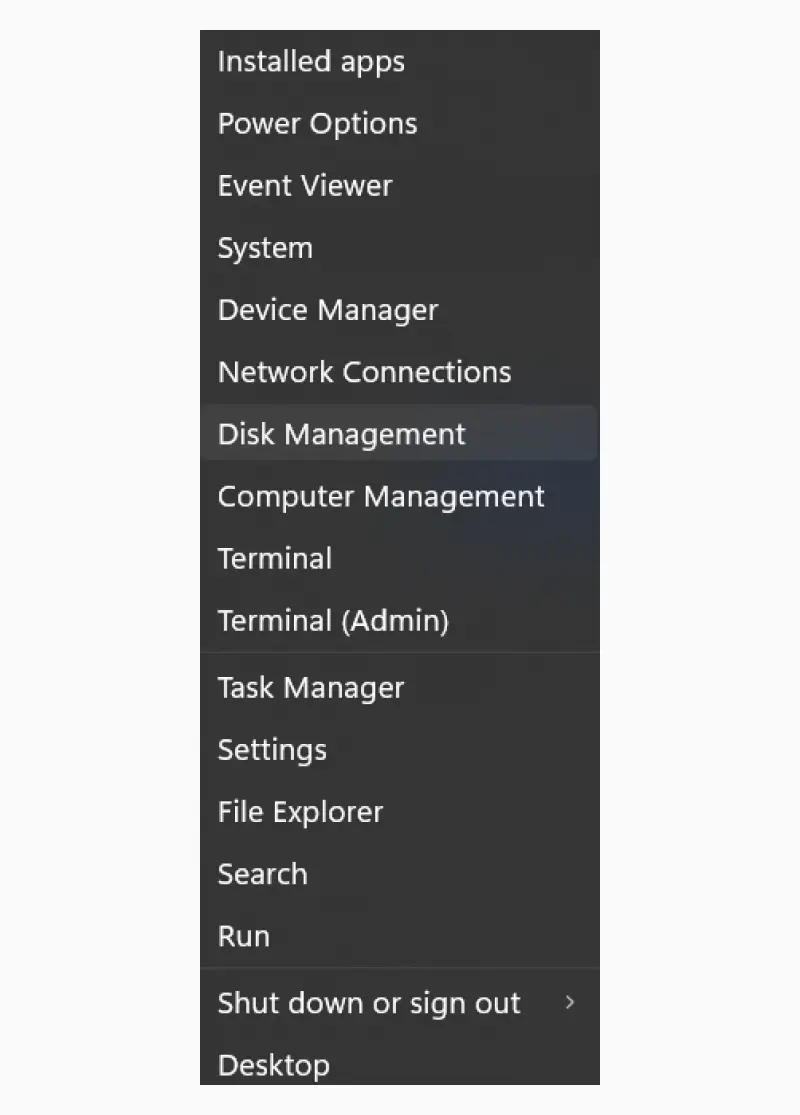
- Press the Windows key + X at the same time.
- Select Disk Management from the menu.
- Determine whether the file system is labelled as RAW or Unallocated.
Disk Management showing either label confirms a corrupt file system. You will need to address corruption with file repair software or re-formatting.
Note: CHKDSK is a built-in tool on Windows. It is designed to fix logical errors for a hard drive. However, CHKDSK sometimes fails to repair file systems and relocate data. As a result, CHKDSK can cause permanent data loss. Be cautious when using CHKDSK.
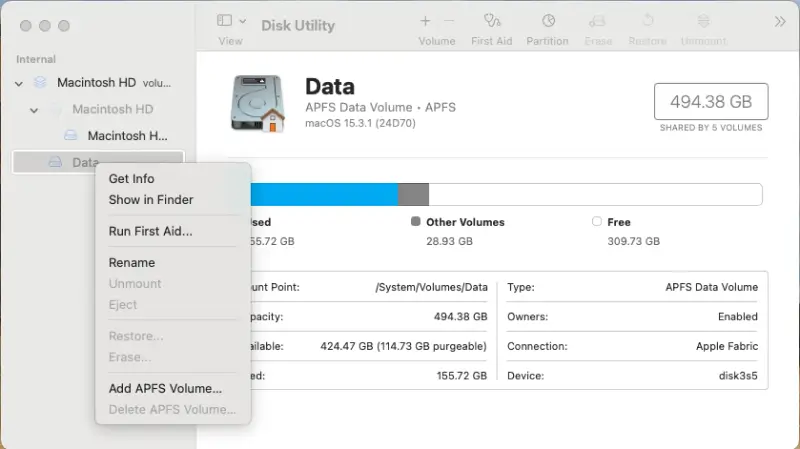
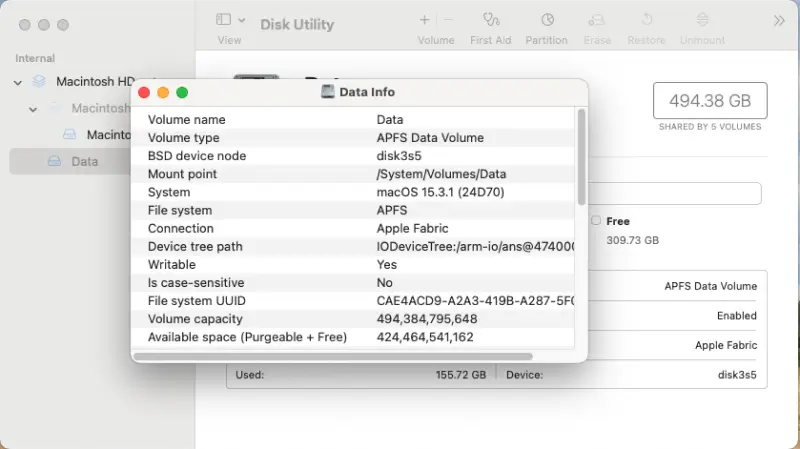
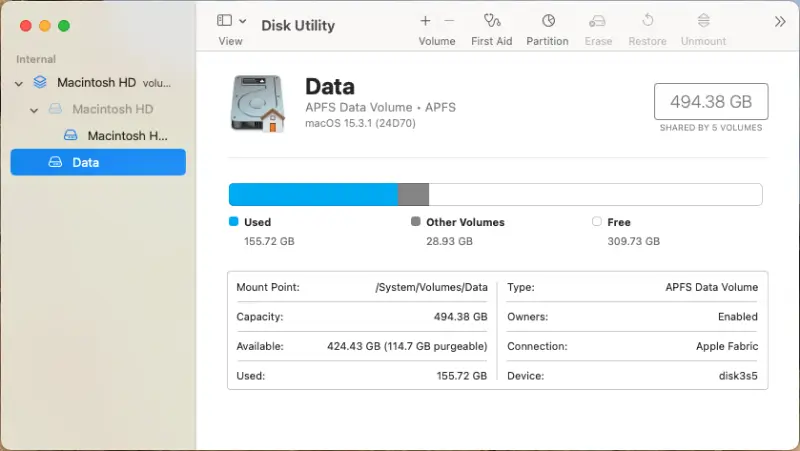
To find the available space on a Mac:
- Enter Disk Utility in Spotlight (Command + Spacebar).
- Right-click the drive in the left sidebar and select Get Info from the menu.
A box showing the amount of used and unused storage will appear. If both values show 0 bytes, then continue to the next step.
To determine the file system on macOS:
- Enter Disk Utility in Spotlight.
- Select a drive from the left sidebar.
- Check the file system and mount status in the main window.
You must resolve issues if you see an Unknown, Untitled, or Unmounted status.
Note: Like CHKDSK on Windows, macOS has First Aid to address logical issues with a device. The same caution applies to First Aid. It could lose data when attempting to repair the file system.
Potential Solutions for a Hard Drive Showing 0 Bytes Free
Here are four quick solutions to fix a hard drive that shows 0 bytes free.
Method 1: Check the Hard Drive’s Connections
Loose connections, faulty cables, or an insufficient power supply can lead to an external device showing 0 bytes free. This error happens when the OS cannot read the drive due to a weak connection. Sometimes, simply fixing the connection between the computer and the external drive will restore access to the file system.
However, these failures can also cause file corruption that persists after reconnecting cables. You will need to use file recovery software in that case.
Note: Be sure to eject an external hard drive before unplugging it from a USB port.
Method 2: Scan and Remove Malware or Viruses
Malicious software can modify the file system, partition, or Master Boot Record (MBR) of a storage device. These changes can force the OS to display 0 bytes free. Run a full system scan with an updated antivirus program to eliminate the infection. Once the malware is removed, the system should show the accurate amount of free space.
Method 3: Assign New Drive Letter or Remount
Drive letter conflicts and hidden or unmounted volumes can prevent the device from accessing stored data. Therefore, assigning a new drive letter can often help the OS detect or remount the device.
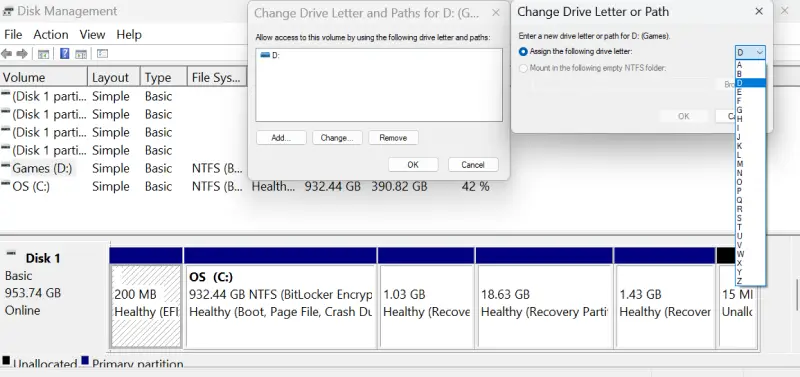
To assign a new drive letter on Windows:
- Press the Windows key + X at the same time.
- Select Disk Management from the menu.
- Right-click the drive showing 0 bytes and choose Change Drive Letter and Paths.
- Click Change.
- Assign a new drive letter from the dropdown.
- Click OK.
To remount the drive on macOS:
- Enter Disk Utility in Spotlight.
- Find the drive showing 0 bytes in the left sidebar.
- Click Mount in the top-right corner if the drive appears grayed out.
These steps should resolve the issue if the drive was not detected or mounted.
Method 4: Format the Hard Drive
Formatting the hard drive is a last resort. The process erases all data on the storage medium and sets up a new file system. It can cause permanent data loss. The risk of permanent data loss from formatting increases with SSDs due to the TRIM command, which purges data immediately. Do not format a hard drive containing critical files without a recent backup or consulting a data recovery expert.
However, formatting can help you start fresh with the same hard drive if you have a complete backup of important data.
Learn more about formatting your hard drive on Windows and Mac.
How To Use SecureRecovery® To Restore Files
If none of the above methods work, it might be time to switch from troubleshooting to file recovery.
SecureRecovery® for Windows
SecureRecovery® for Windows works with 32-bit and 64-bit versions of Windows 11, 10, 8, 7, Vista, and XP. The data recovery software features powerful algorithms that scans for lost files. Including on drives showing 0 bytes free. It can recover most file types on HDDs, SSDs, and other media. The tool also has a free demo that allows users to preview the drive’s retrievable data.
Here is a step-by-step guide for using SecureRecovery® for Windows:
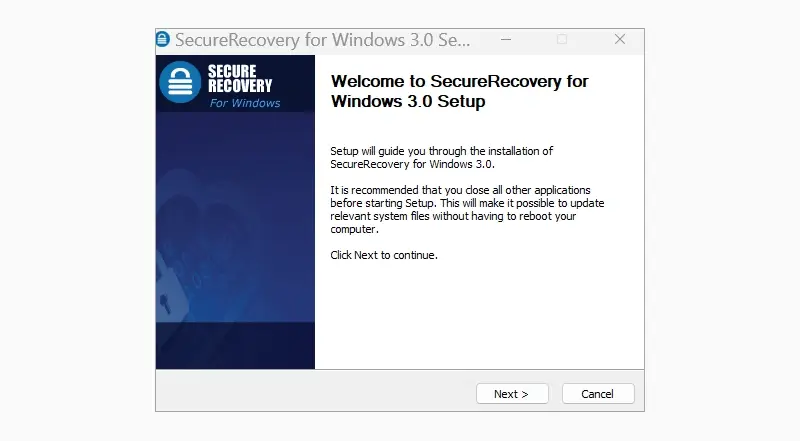
- Install the software. Do not download the software to the drive with data loss. Doing so could overwrite stored data.
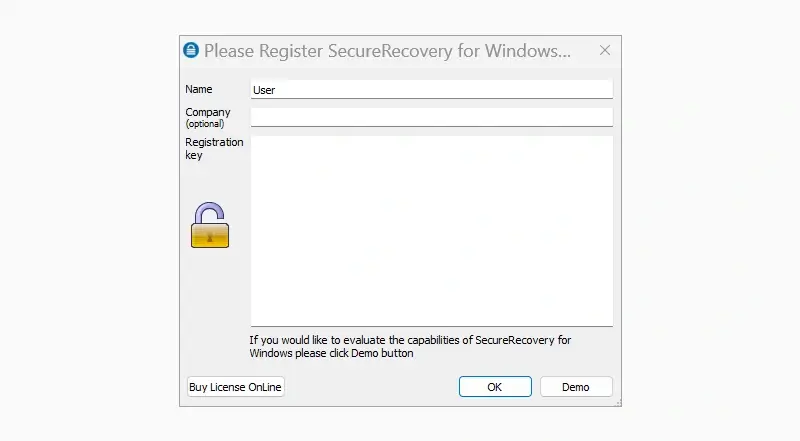
- Enter product key or try the demo. You will need to buy the full version to recover data.
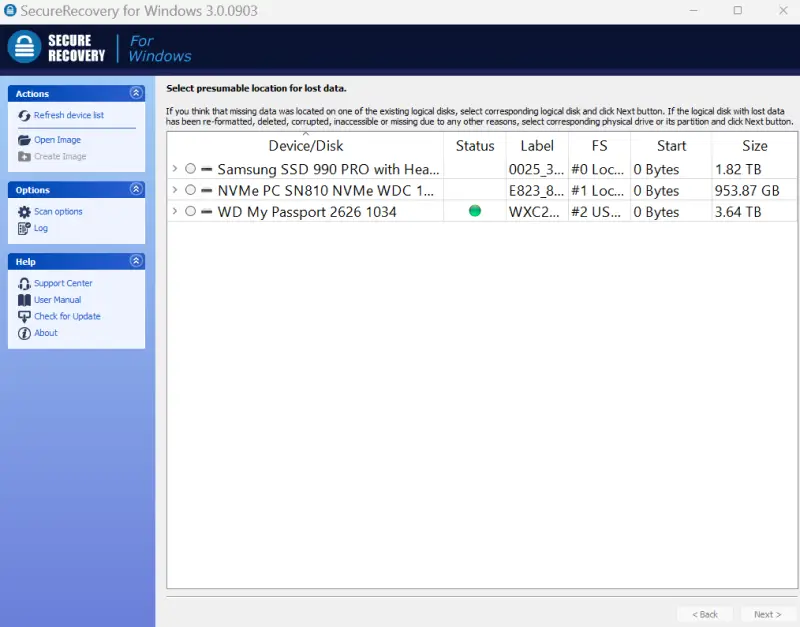
- Select the device. You may need data recovery services if your disk does not appear in the list.
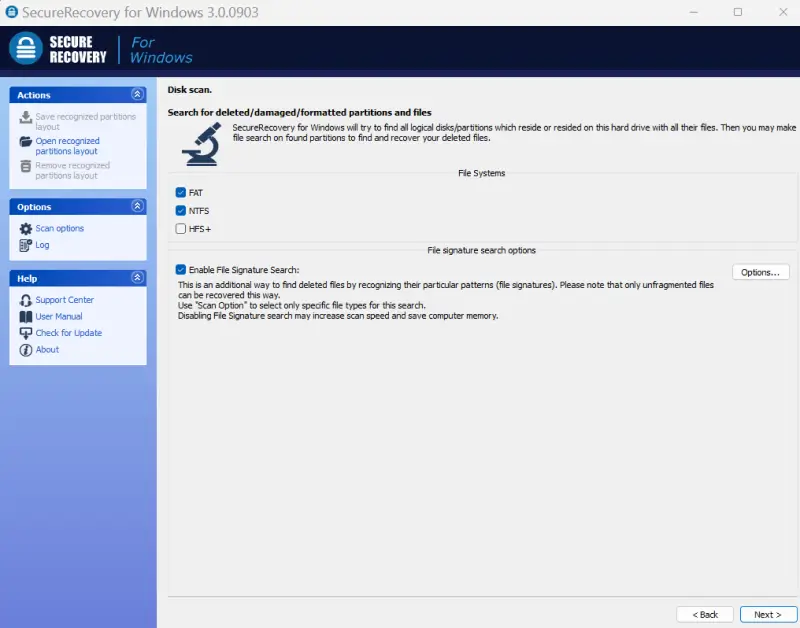
- Set scan options. Most Windows users will choose NTFS or FAT. You can adjust the settings to search for specific files in the Option menu.
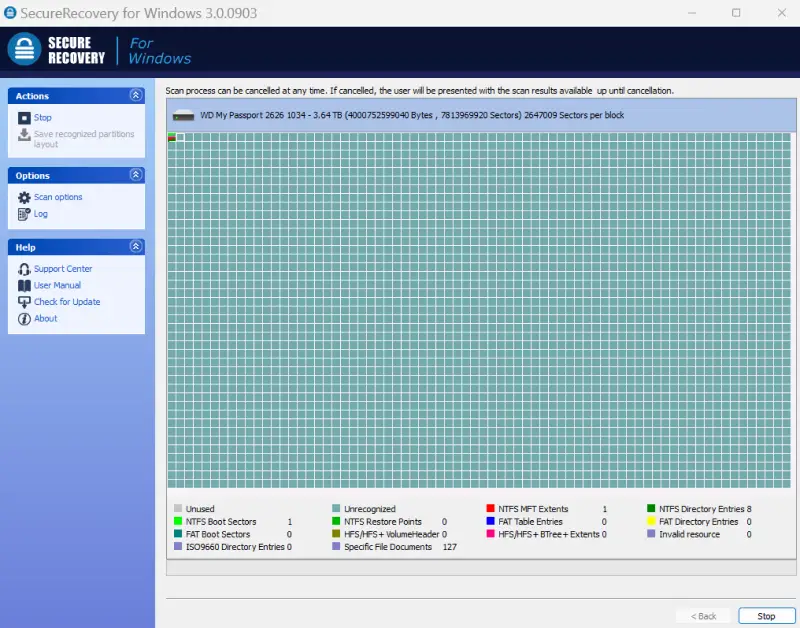
- Run the scan. The scan length depends on the search parameters and amount of data saved to the drive. Stopping the scan shows results to that point.
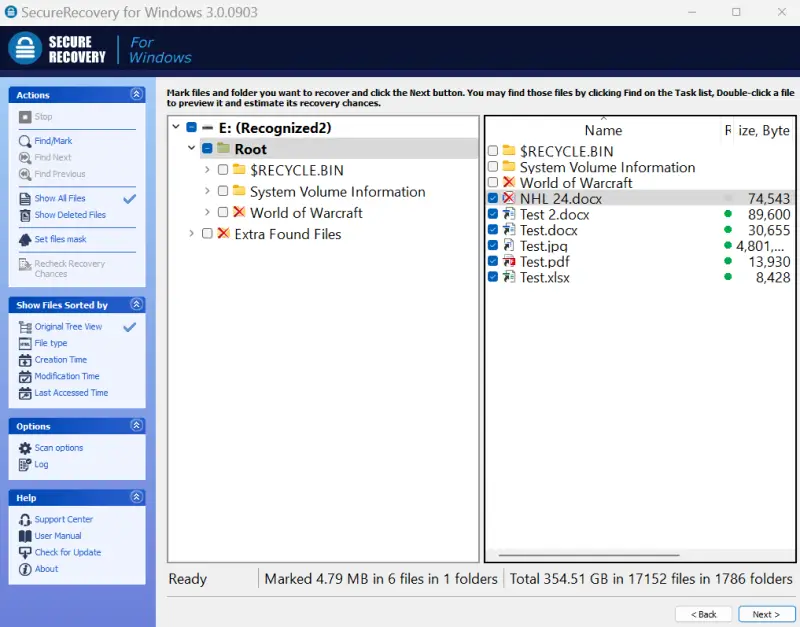
- Recover files. Select the desired files from the tree view.
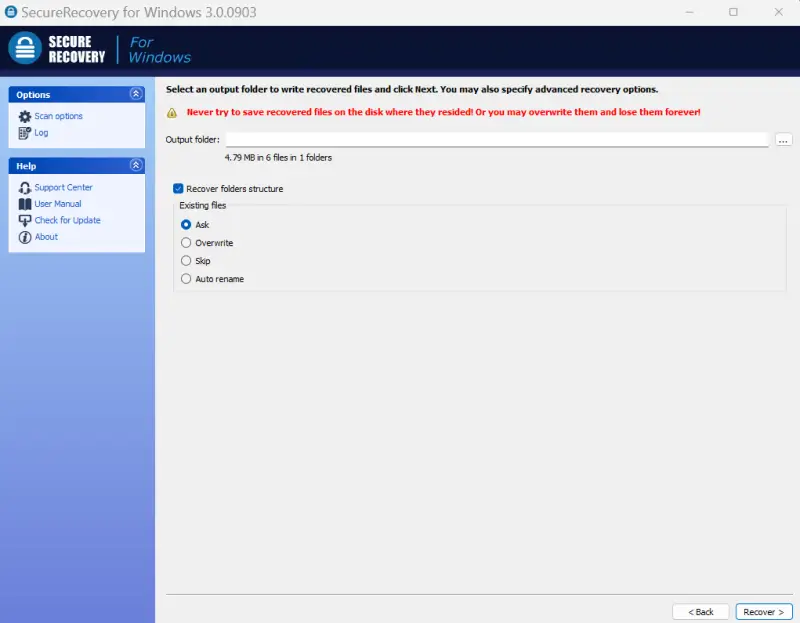
- Choose the output folder. Pick the location to restore files. Do not pick the source drive. Click the Recover button in the bottom-right corner of the software.
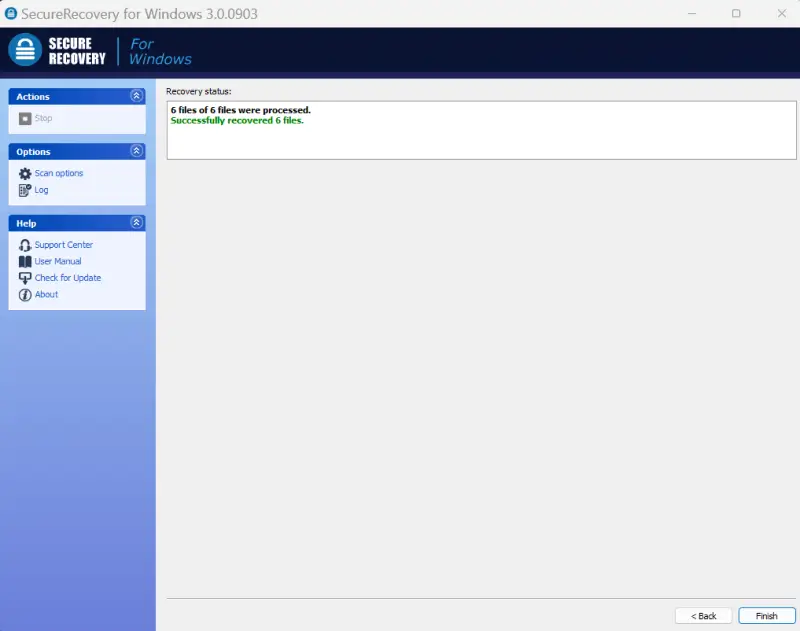
- Confirm success. A screen appears that displays the status of the recovery. Check the output folder once finished.
The software is that easy to use.
SecureRecovery® for Mac
SecureRecovery® for Mac is designed for macOS Monterey and older versions. You can use the program for Macs with a hard disk or flash storage and external drives. The software works with APFS, HFS Plus, HFS, or exFAT file systems and M-series, Intel, or PowerPC processors. It includes a free demo to preview data.
Here is a step-by-step guide for using SecureRecovery® for Mac:
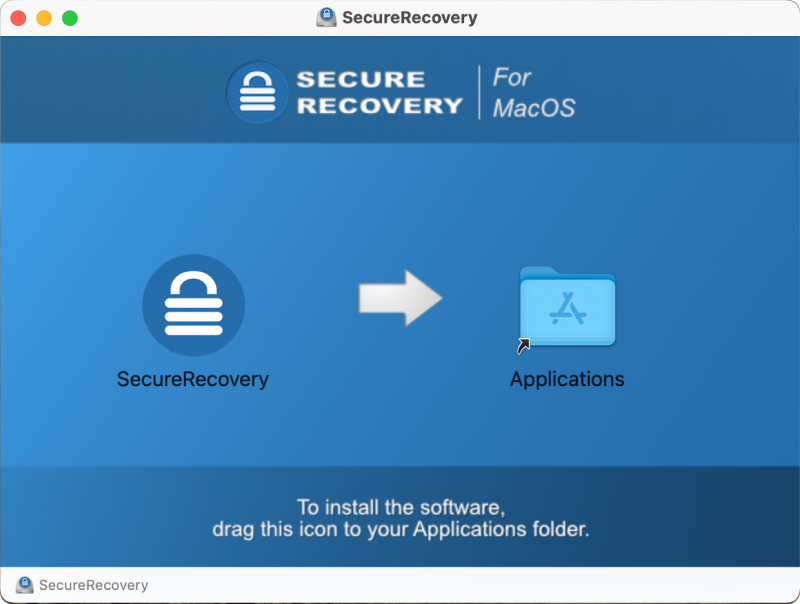
- Install the software. Do not download the tool to the target drive. It could overwrite lost files.
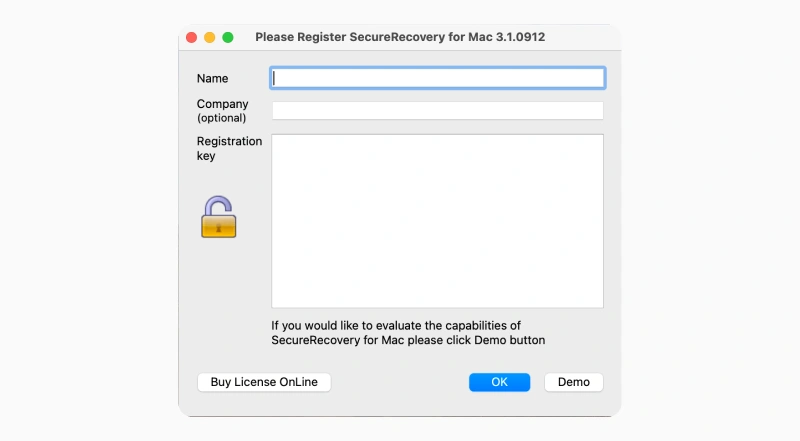
- Enter the license key or use the demo. You will need the full program to restore files.
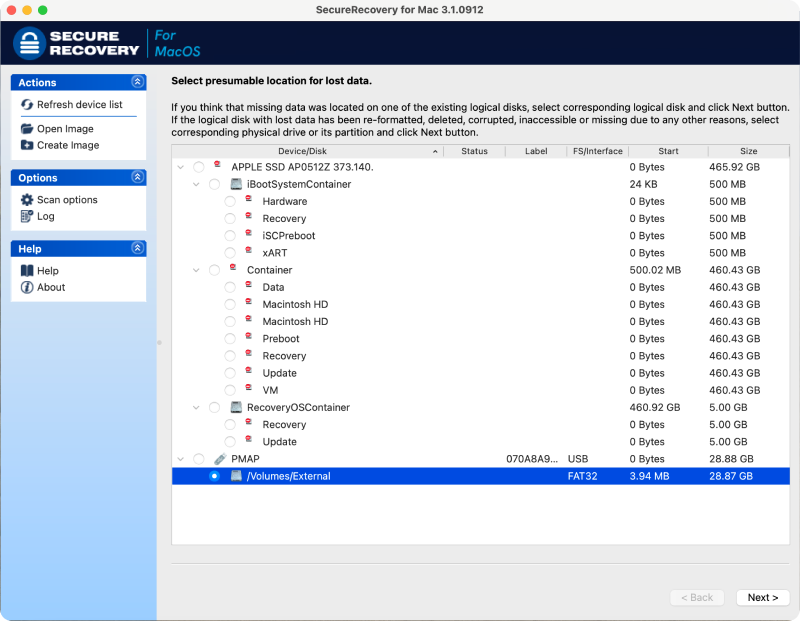
- Choose the drive with lost data. You might need more advanced tools to recover data if your device is not detected.
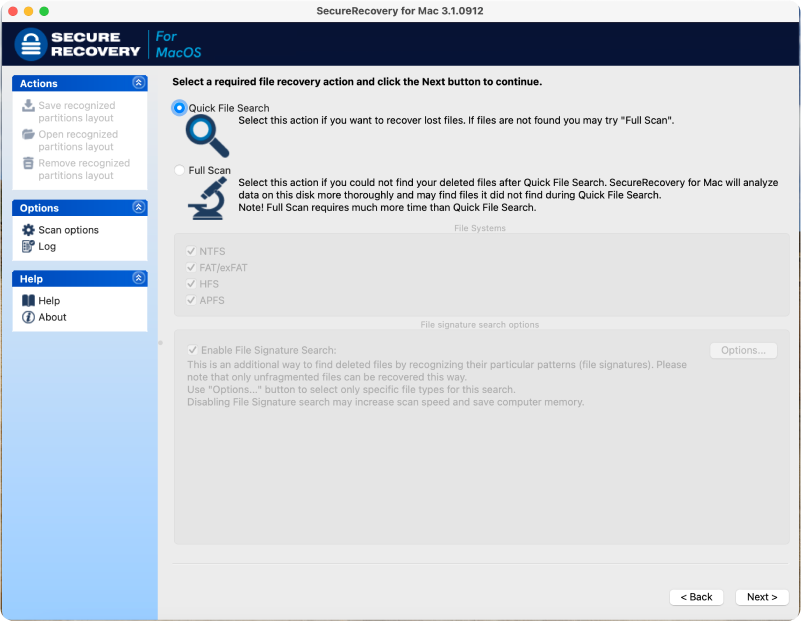
- Select scan options. Choose how the software scans for data. You can also search for specific file types.
- Run the scan. The length of the process depends on whether you are running a Quick File Search or Full Scan.
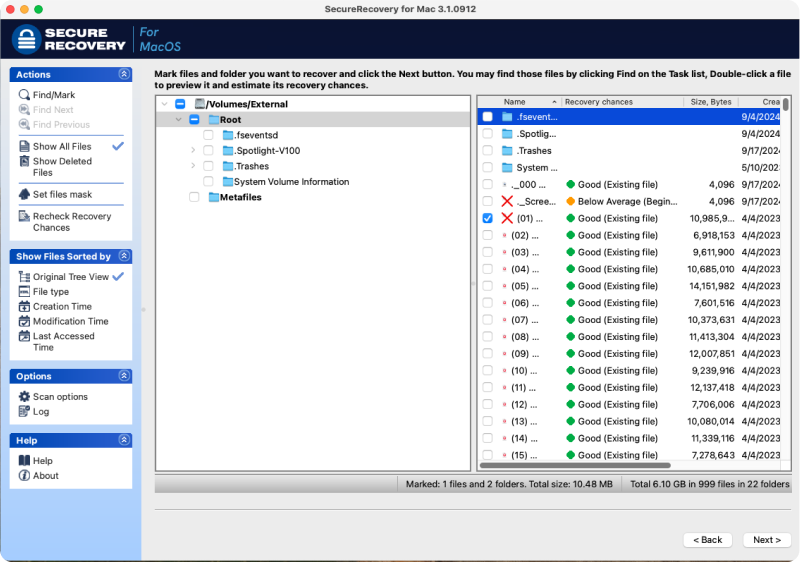
- Restore files. Highlight the desired files in the tree list and click Next.
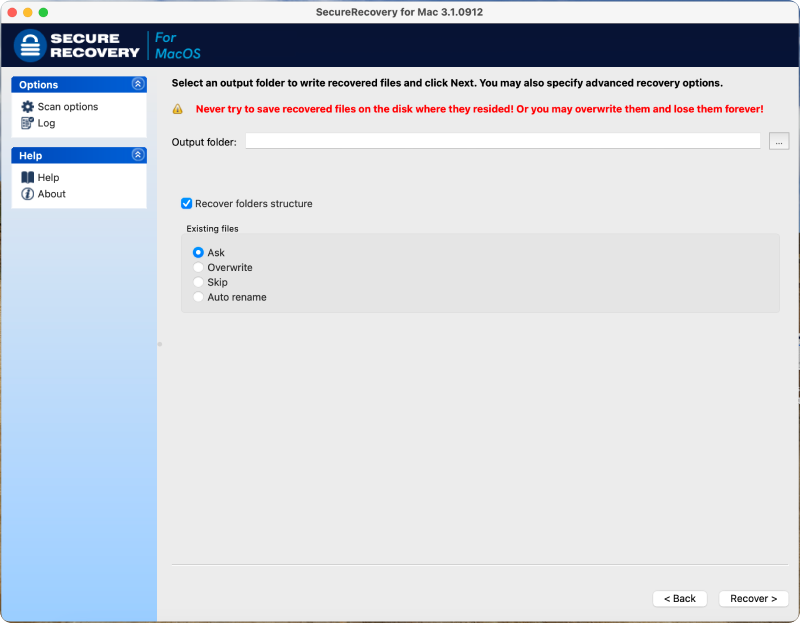
- Set the output folder. Choose where to save recovered files. Pick a different drive than the affected device.
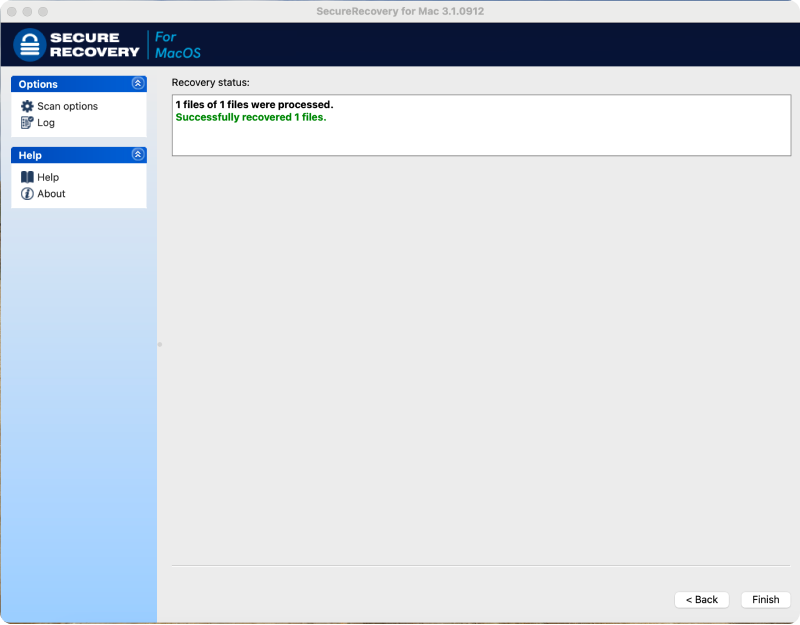
- Confirm success. The tool provides a recovery status. Verify the files are restored to the output folder.
Our file recovery software makes restoring data on Macs easier than ever.
When To Seek Professional Help for Zero-Byte Drives
OfficeRecovery supplies users with simple, effective solutions that allow people to restore files themselves. Regardless of their experience or expertise with data loss events. Our suite of data recovery software and file repair tools are proven to resolve many logical errors. Those failures include hard drives showing 0 bytes free.
However, some logical issues require custom tools and techniques to recover data. You can contact Secure Data Recovery for a free quote for professional services if the software does not restore files. Featuring a 96% success rate and a No Data, No Recovery Fee guarantee. You either get your data back, or pay nothing.

